Niles the Animatronic Parrot
Niles is an animatronic parrot that is actuated by (x4) 9g micro servos and controlled by Pololu's Maestro Control Board. To get started you will need:
(x 4) 9g Micro servos
(x 2) Eyes
(x 1) Micro Maestro Control Board
(x 1) Micro USB to USB cable (With data line)
(x 1) 5-6v Power supply (This will power our servos)
(x 1) 1 kg PLA Plastic
A bunch of Paper Clips
Lots of feathers (The more the merrier)
Lots of Hot glue
(x 1) Short but Fat Spring (Highly recommended)
(x 6) 6-32 Wood screws
(Optional) Spray Paint
(Optional) Clear Elmer's Glue (This will be used to make the beak shinny/glossy after it is painted)
Alright, let's get started!
First, print all the parts, which can be found on here on thingiverse. (Be sure to scale up the Skull and Jaw 300% in Cura. Also, only print the jaw with support. Everything else can be re-oriented to print without support).


(I know the text on the picture says 360 degrees. That is wrong. A servo can only move from 0-180 degrees. When I was writing the description for the pictures I was playing around with my 360 degree servo motor, and I must have gotten confused and kept thinking that 180 was 360. Sorry for that.
Word of advice: If your going to write a tutorial with normal servos don't play around with 360 degree servos while doing so. It will confuse you.)


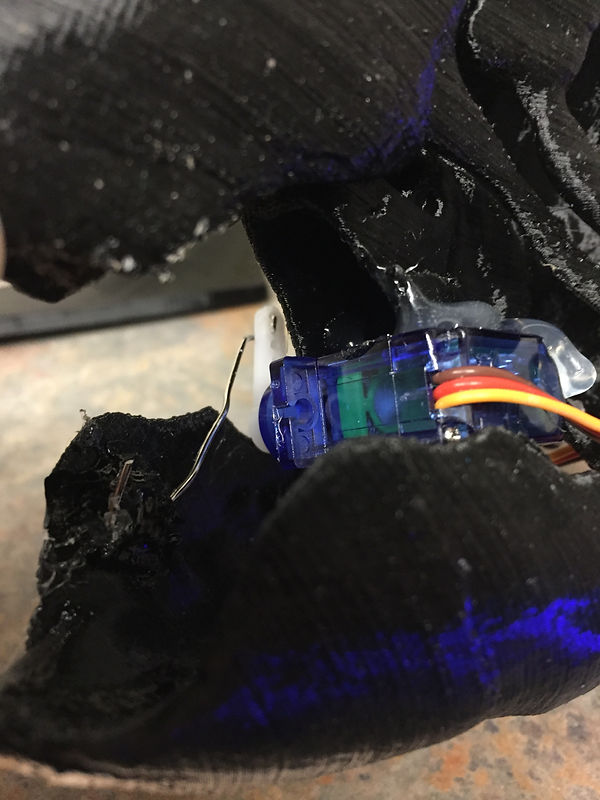
In the next step/picture I used a soldering iron to make my hole/slot for the paper clip to slide in and out of. Once I put the paper clip through I bent it in a hook shape so it wouldn't slide out which would cause the jaw to drop (refer to pictures below). This way when the paper clip grabs onto the hole/slot that we made it will pull the jaw up and when the servo is moving downward it will push the paper clip down and the jaw will drop down accordingly.


Ok, so I had a small problem. My linkage mechanism (the paper clip) wouldn't work the way it previously did. If you run into this problem where the mouth Does not fully close when the servo reaches the home position you must face the servo horn UP instead of DOWN. That's all you have to do. Just unscrew the servo horn and face it up. Leave the servo angle the way it is. Do not change it, or else you will have to tamper with it even more.


I got excited and started feathering the head. I also spray painted the servo and paper clip black so they blend in with the skull and don't stick out.


You may notice that the servo will be on an angle. This is perfectly fine. (If your's isn't on an angle that's fine as well). The angle makes the neck look a bit more natural. Just make sure you don't have too much of an angle, or else you'll have to compensate by tilting the neck mechanism down. So to simplify it: Small angle good. Big angle bad.


(I know the text on the picture says 360 degrees. That is wrong. A servo can only move from 0-180 degrees. When I was writing the description for the pictures I was playing around with my 360 degree servo motor, and I must have gotten confused and kept thinking that 180 was 360. Sorry for that).


Wings closed

Wings Open


Now that you have the body built you can start feathering it. Just take some feathers and some hot glue and layer the feathers on top of each other while covering the whole body. Just be careful and avoid getting glue on any joints (ex. the hinge).
If you want you can use Clear Elmer's Glue to make the beak shiny. Just apply a small amount of Clear Elmer's Glue to the beak and evenly spread it around making sure you cover the whole area. Let it dry, and your beak should be nice and shiny.
For servo control visit the Pololu website. They have an excellent video on how to get started with the Maestro board. I am currently working on giving my Parrot a voice. I have found the schematics for a board that allows you to plug in audio and the servo will automatically move in sync with the audio. No programming required!. Its called the Scary Terry board.
Once you have that built I would recommend creating a movement routine in the Maestro board and have it triggered with either a button or motion detector and have the audio from the Scary Terry board wired to that same button or sensor that way when the sensor or button is activated the mouth will move in accordance to the audio and the body will move however way you programmed it. (So you would have 2 separate circuits. The Maestro circuit and the Scary Terry circuit. (The jaw servo won't get plugged into the Maestro. It will plug into the Scary Terry board). Then you will have to listen to the audio and create a movement routine accordingly).
Enjoy!

